about this guide
Block Enrollment allows you to create a block of students and enroll them into a block of classes. This guide shows you three ways to create the student block: entering individual student IDs, uploading a file of student IDs and by PS Query.
Pre set-up
Step 1: Name your Student Block
There are 5 characters available to name your student block. Each college/department using this process will have a unique starting initial followed by 4 numbers. For example, we will use E0001, E0002, etc. for all Eller student blocks. It is important that your descriptor remains unique to make them easier to identify in a list and to track who the block belongs to.
Step 2: Identify the Major and Requirement Term
Before you Create a Student Block you will extract groups by major (ex. ACCTBSBA) and requirement term (ex. catalog year Fall 2008). For example, we will use a group created by Eller. Eller has 8 majors and 2 or 3 catalog years for each one.
Step 3: Preplan Blocks
You will start with your smallest group for a scenario where you may have one large group of students needing to enroll in the same 3 courses but within that large group you might have 2 subgroups require enrollment in different courses. In our example, Eller has cohorts for morning and afternoon, and we will differentiate these groups with the words Cohort A and Cohort B in the naming convention of our Student Block.
Step 4: Create Student Block
In UAccess, navigate to Menu > Records and Enrollment > Enroll Students > Block Enrollment > Create Student Block.

Step 5: Find an Existing Value
Always perform a search before creating a new value. This will assist you in keeping your Student Enrollment Block codes in order and allow you the opportunity to track what should become the next sequential code.
To Find an Existing Value you will need the Student Enrollment Block or the Description.
Note: If you attempt to create a value that already exists, you will receive a notification. You may select and update the existing value or add a new value.


Step 6: Add a New Value
To add a new value select the Add a New Value button.

Step 7: Create the Student Block
Enter the following values:
- Academic Institution: UAZ00
- Student Enrollment Block: For this example we will enter the code E0001.
- Add: Click Add.
Note: E designates the block as belonging to Eller and 0001 marks this code as the first one created for this process. The Block Enrollment Students screen will appear.
Next decide your method of student block creation:

CREATE STUDENT BLOCK BY INDIVIDUAL STUDENT IDS
Step 1: Adding Students to the Block Enrollment
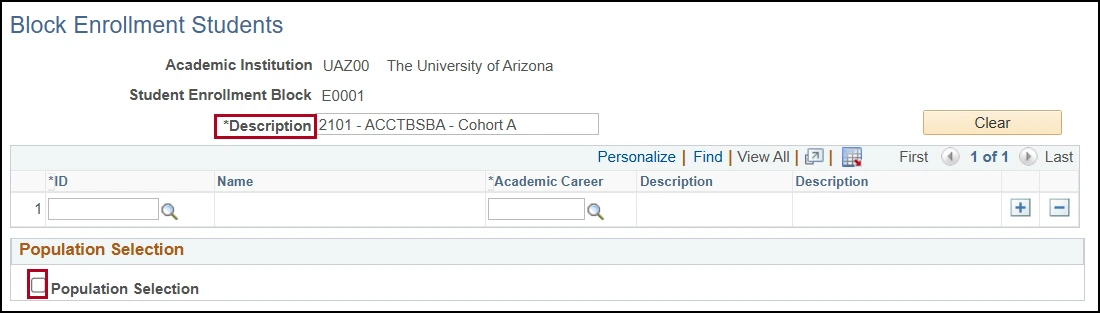
When creating a new Student Block, you will need to add the following fields:
Description: You have 30 characters to make this as descriptive as possible. Eller created a description of “2101 – ACCTBSBA – Cohort A” to describe a block of students who were admitted into the accounting major in Spring 2101 and are grouped in the morning cohort.
ID: Student IDs must be manually entered into this Student Block one by one.
Academic Career: The career will be UGRD (Undergrad).
Use the plus (+)/minus (-) sign to add/remove a new row.
When your student block is complete, press Save.
For instructions on proceeding with Block Enrollment see Block Enroll Merge.

CREATE STUDENT BLOCK BY uPLOADING A FILE OF STUDENT IDS
Step 1: Adding Students to the Block Enrollment
When creating a new Student Block, you will need to add the following fields:
Description: You have 30 characters to make this as descriptive as possible. Eller created a description of “2101 – ACCTBSBA – Cohort A” to describe a block of students who were admitted into the accounting major in Spring 2101 and are grouped in the morning cohort.
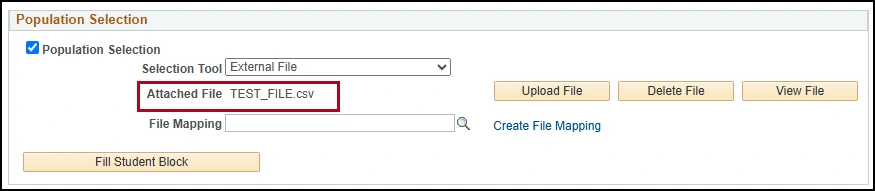
Population Selection: Check the Population Selection checkbox.

Step 2: Selection Tool
Under Selection Tool, select External File to upload a list of IDs.

Step 3: External File
Select the Upload File button and then the Choose File button to locate the file you have saved for this purpose. Once you locate the file press the Upload button.
Note: The process will only accept comma delaminated file structures. If your data exists in Excel you should save it as a CSV (Comma delimited) (#.csv) file type.
Or you can create a txt file in the following format:
EMPLID, ACAD_CAREER
01234567, UGRD
Note: Your txt or csv file should contain only ID numbers and the student’s classification code. ACAD_CAREER values must be in upper case to correctly upload.

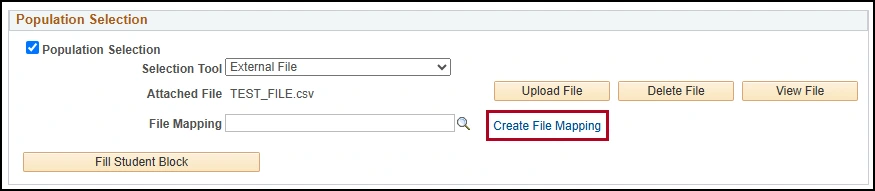
Step 4: Edit File Mapping
Each person that uses the Create Student Block feature will need to create their own File Mapping structure. You will only need to set this up once. After your first process is complete you will simply choose the value you have created here in subsequent Student Blocks. Click on the Edit File Mapping link.
Step 5: Create the File Mapping Definition
Create the File Mapping Definition using the criteria below:
File Mapping: Enter a name for your File Mapping rule
Public: Leave this box unchecked
File Type: Select Delimited
Field Delimiter: Select Comma
Field Qualifier: Enter “
Header Row: Check this box
Header Row Number: Enter “1”

Step 6: Create the Mapping Tab
Create the Mapping Tab using the criteria below:
5 EMPLID - Field Number: Enter “1”
6 ACAD_CAREER - Field Number: Enter “2”
Once you have created your file mapping, press OK.

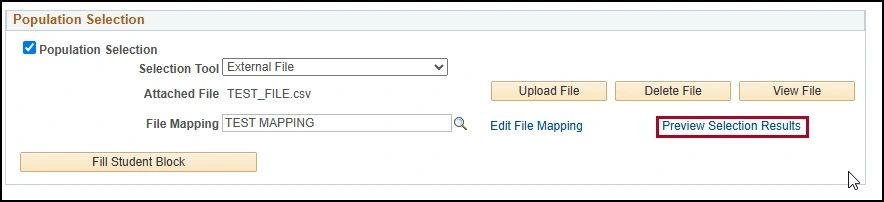
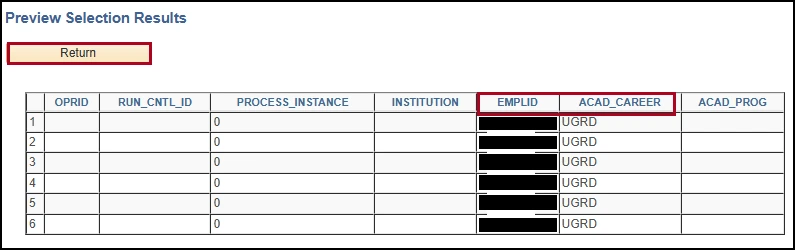
Step 7: Preview Selection Results
Click on Preview Selection Results.
Expect to see your list of IDs along with the Academic Career for each ID. If no data appears then your file may not be set up with the correct format (ID, Career). Click on the Return button to return to the process.
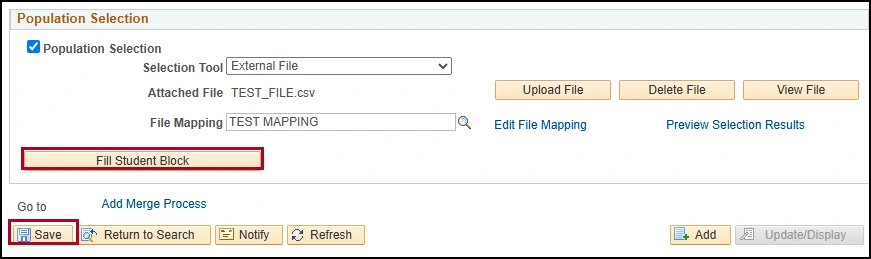
Step 8: Fill Student Block
Click on the Fill Student Block button. Then click Save.
If all of your data appears as expected you can continue enrolling this group in classes or you can abandon the process at this point in time and continue with enrollment at a later time.
For instructions on proceeding with Block Enrollment see Block Enroll Merge.
CREATE STUDENT BLOCK BY PS QUERY
Step 1: Adding Students to the Block Enrollment
When creating a new Student Block, you will need to add the following fields:
Description: You have 30 characters to make this as descriptive as possible. Eller created a description of “2101 – ACCTBSBA – Cohort A” to describe a block of students who were admitted into the accounting major in Spring 2101 and are grouped in the morning cohort.
Population Selection: Check the Population Selection checkbox.
Step 2: Selection Tool
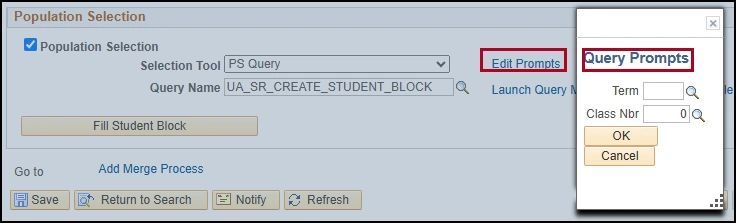
Under Selection Tool, select PS Query to upload a list of IDs.

Step 3: Add Query
Use the spyglass to find your PS Query or manually enter the Query name. Selecting the spyglass opens Search Results to choose from.
Note: Upon entering your Query you should notice a new Edit Prompts link which appeared. You will use this to fill in Query Prompts search criteria such as term or class number.

Step 4: Preview Selection Results
Click on Preview Selection Results and expect to see your list of IDs along with the Academic Career for each ID. If no data appears then your query may not be set up with the correct format or is not collecting the correct data. Click on the Return button to return to the process.

Step 5 Fill Student Block
Click on the Fill Student Block button. Then click Save.
If all of your data appears as expected you can continue enrolling this group in classes or you can abandon the process at this point in time and continue with enrollment at a later time.
For instructions on proceeding with Block Enrollment see Block Enroll Merge.

BLOCK Enroll Merge
Step 1: Merge Process
If you are continuing from the Create Student Block page:
Select the Add Merge Process link
Move to Step 3
If you are returning to the process:
In UAccess, navigate to Menu > Records and Enrollment > Enroll Students > Block Enrollment > Block Enroll Merge


Step 2: Add a New Value
Click on Add a New Value.
Next, we have two options:
Enter a pre-built block of classes or
Create them on the fly
In this example we will create the block of courses on the fly.

Step 3: Student Block
Enter the Student Block ID where your block of students have been placed. For this example we will choose E0001.

Step 4: Class Block
Select the Detail/Create link under Class Block.

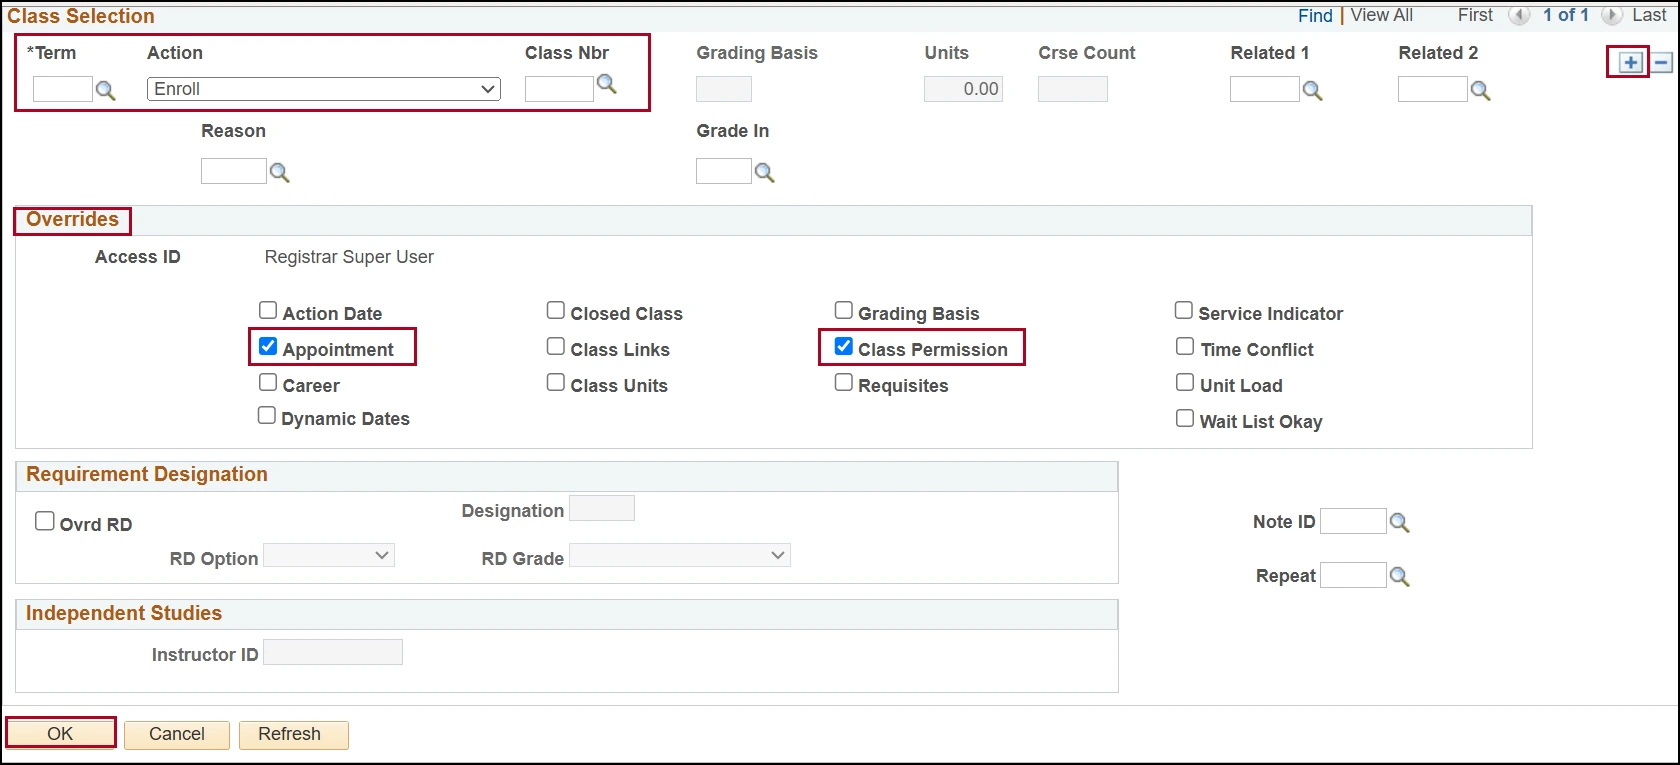
Step 5: Create Customized Class Block
To create the Customized Class Block (you will create this anew for every term) following the criteria below:
Term
Action Reason: Enroll
Class Nbr
Overrides: Appointment and Class Permission checkboxes
Click OK
Note: To add additional courses you will use the plus sign (+) to create a new row where another class could be added to this block. Action reasons can also be applied here but only after exiting the screen and re-entering.
Step 6: Block Enroll Merge
Click the Merge button and the students in the E0001 block will be merged with the courses you have selected—but they are not yet enrolled.

Step 7: Complete Enrollment
Click Submit to complete the enrollments.

Step 8: Request Status
If the Request Status is “Success”, then you are done. If the status is “Error” continue to the next step.

Step 9: Retrieve
Click the Retrieve button to pull a complete list of students in the block and their associated success/error message for this block enrollment.

Step 10: Review Status
You will see a Status of “Success” or “Errors Found” for each student. There is link for DETAIL listed for each row.

Step 11: Review Detailed Message
Click DETAIL to read a detailed error message that should explain the error. Review the errors and resubmit the request.

need help? contact us!
For questions related to releasing and interpreting directory restricted information, reach out to the Office of the Registrar at reghelp@arizona.edu.
created 12/2025