about this guide
There are various processes in the UAccess Instructor Center for assigning grades for individual students, multiple students at once, and managing the Approval Status of the grade roster. This resource guide covers those functions and, also offers guidance for assigning failing grades, and explains the implications of different Approval Status options.
Note: Grade rosters are due within 48 hours after the final exam or the last day of finals if no final exam is given, as per university policy. Refer to the resource guide for more information.
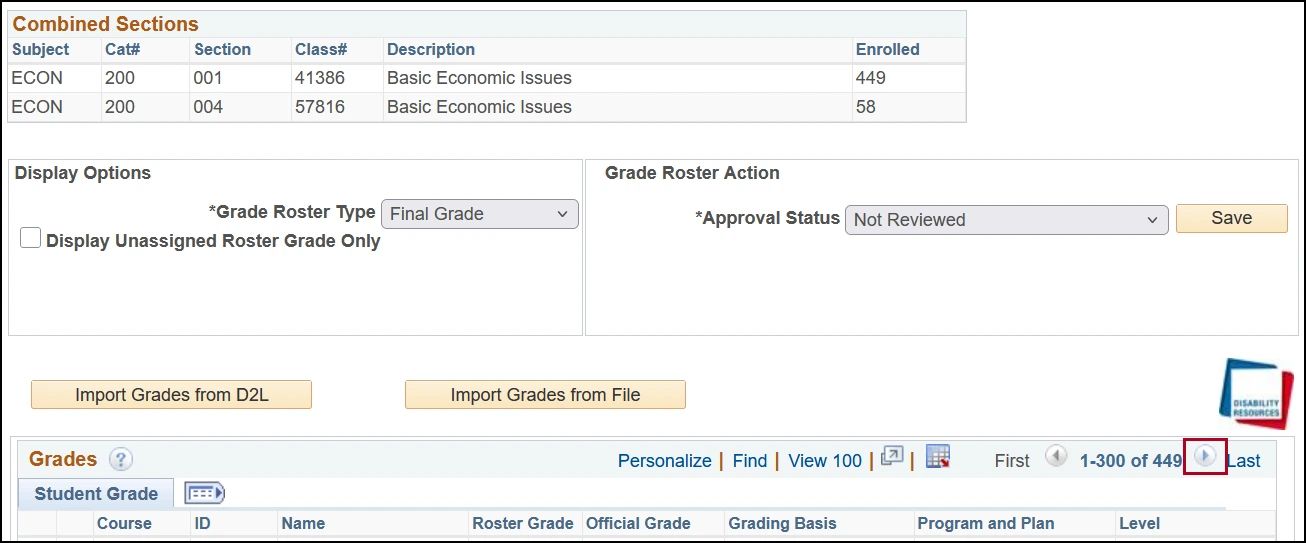
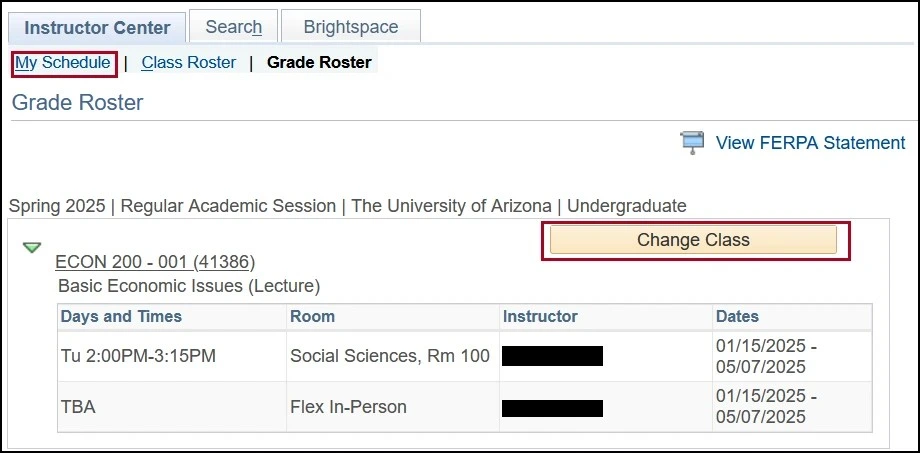
How to VIEw the Grade Roster
Step 1: Click the Grade Roster in Progress icon for the class you want to view.

Step 2: Grade rosters for the first 300 students will display on the first page. For rosters over 300 students, use the Next arrow.
Step 3: To return to the main page, click the My Schedule tab near the top of the page or the Change Class button.
How to grade individual students
Step 1: In the Roster Grade column select the appropriate grade for each student. If you are entering a failing grade (E or F) please reference the Assigning a Failing Grade section directly below.
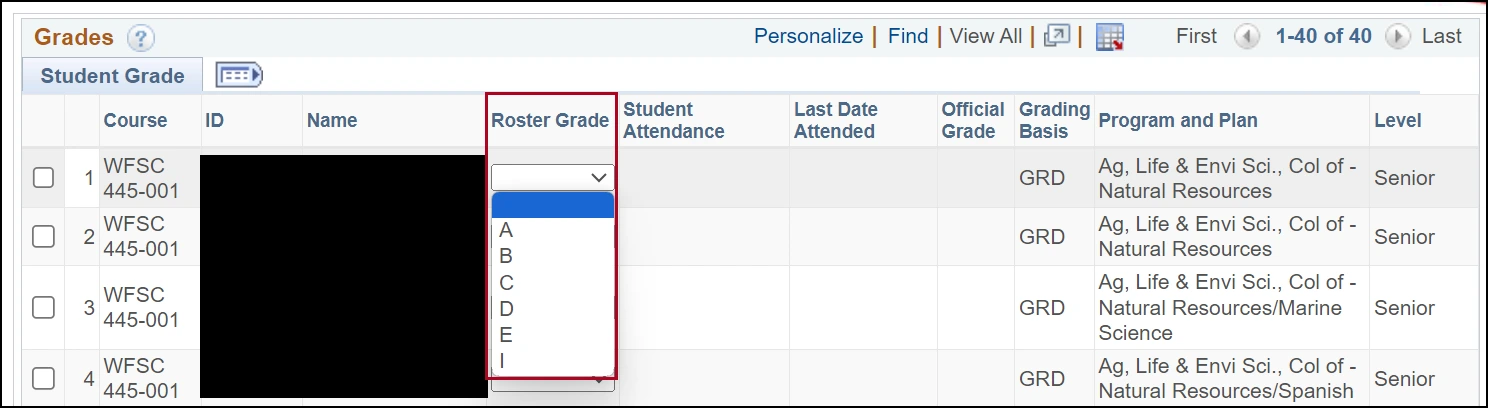
Step 2: Once you are done, click Save at the bottom of the roster.

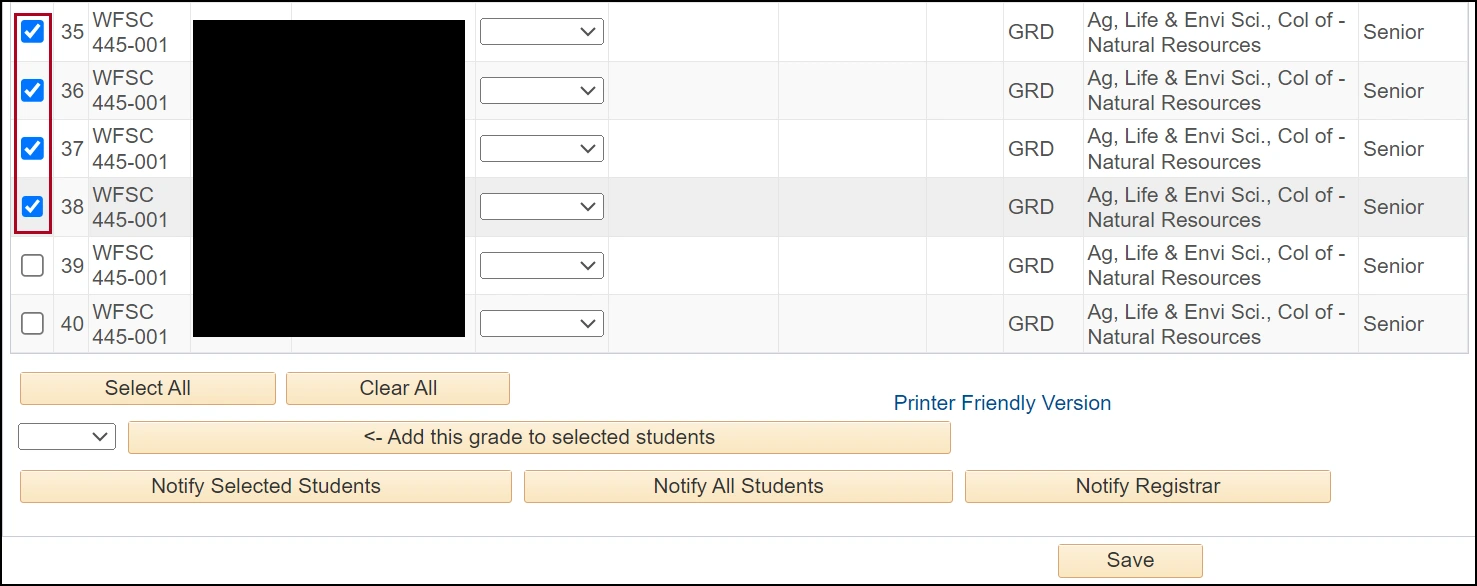
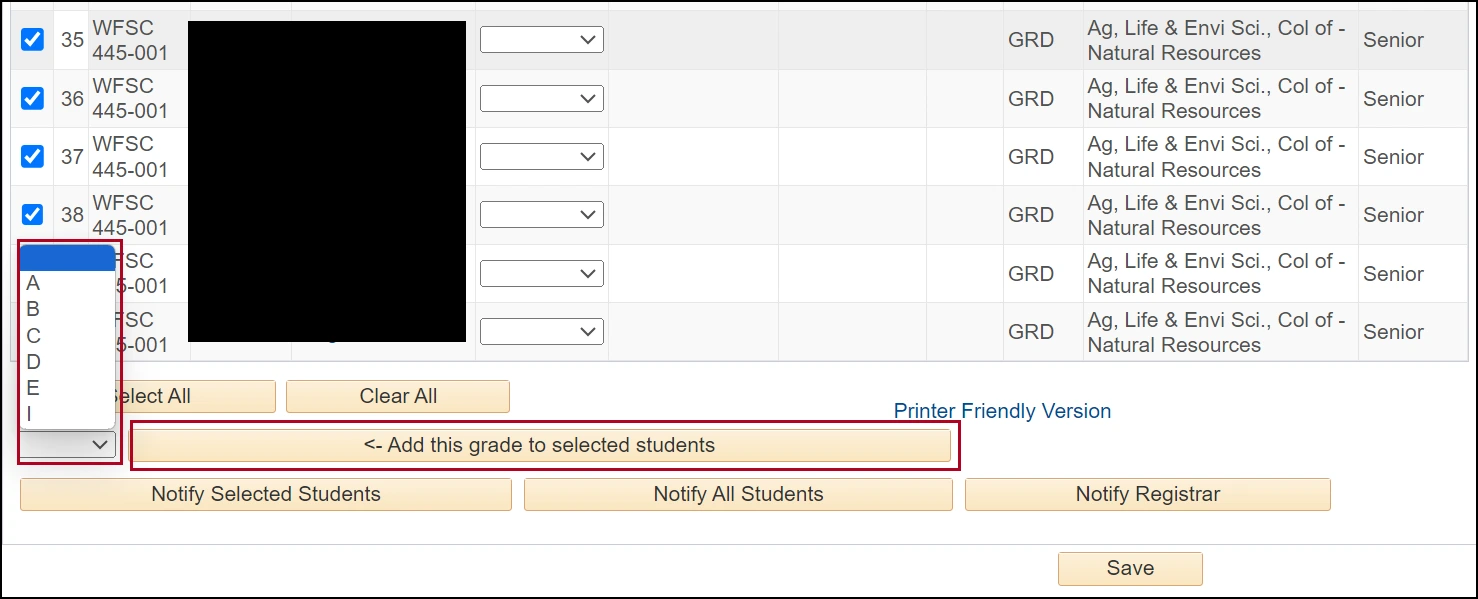
How to grade multiple students at once
Step 1: Clicking the checkbox in the far-left column for all students receiving a particular grade.
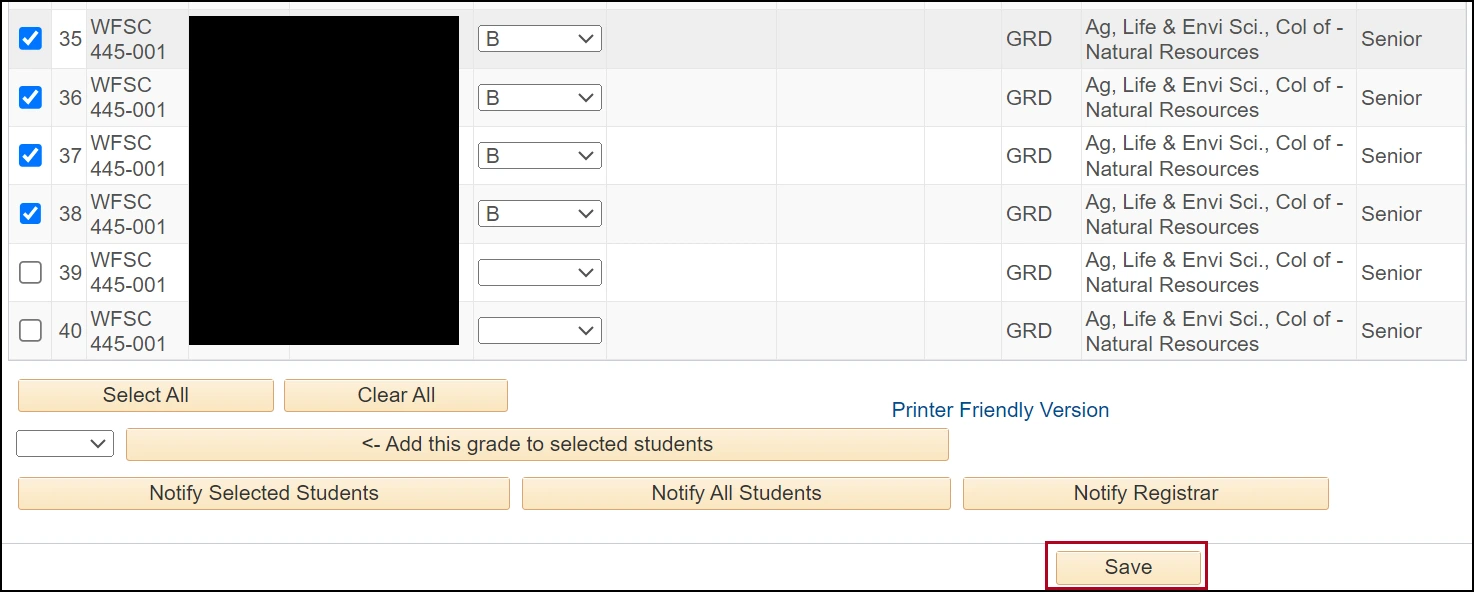
Step 2: At the bottom of the roster is a drop-down box to the left of the add this grade to selected student's button. Select the appropriate grade and then click the button. All the students designated in the previous step (Step A) will now show that grade in the Roster Grade column.
Step 3: Once you are done, click Save at the bottom of the roster.
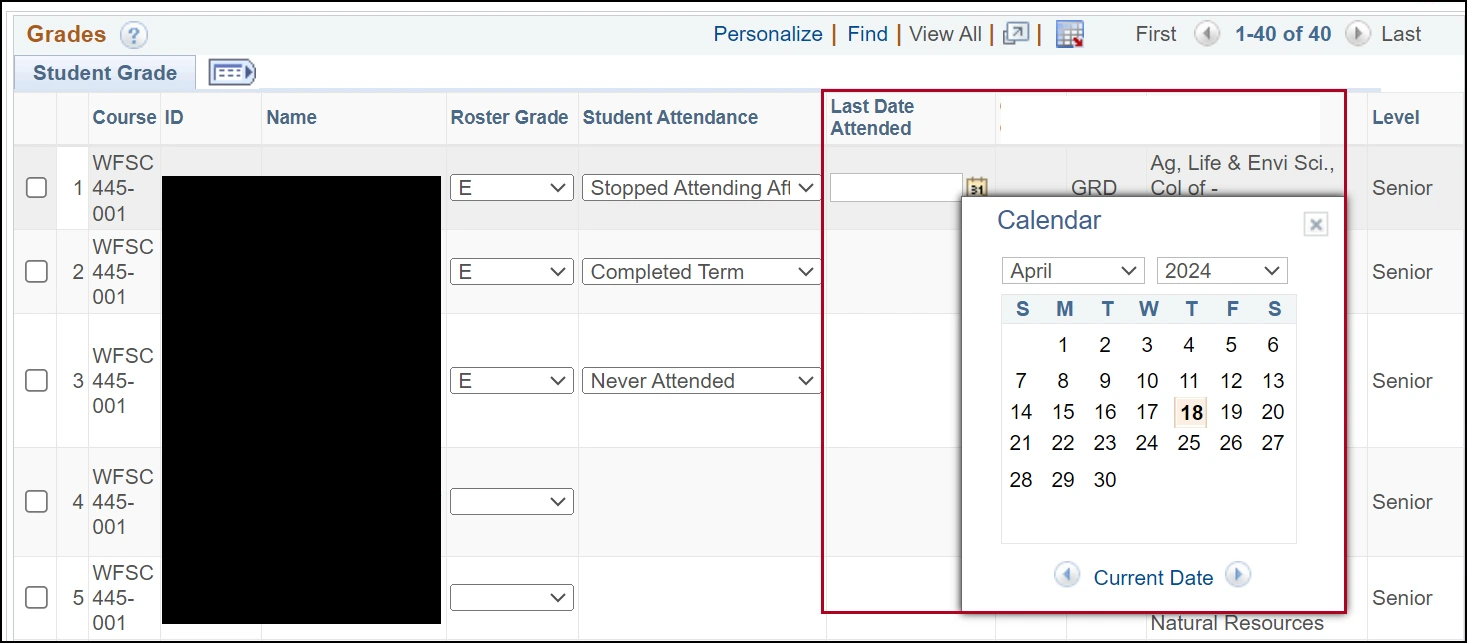
HOW TO assign a failing grade
Step 1: In the Roster Grade column select the failing grade (E or F).
Step 2: Once a failing grade is selected, a drop-down menu is displayed in the Student Attendance column.
Completed Term indicates the student attended and earned the failing grade.
Never Attended indicates the student has not attended the class and earned the failing grade.
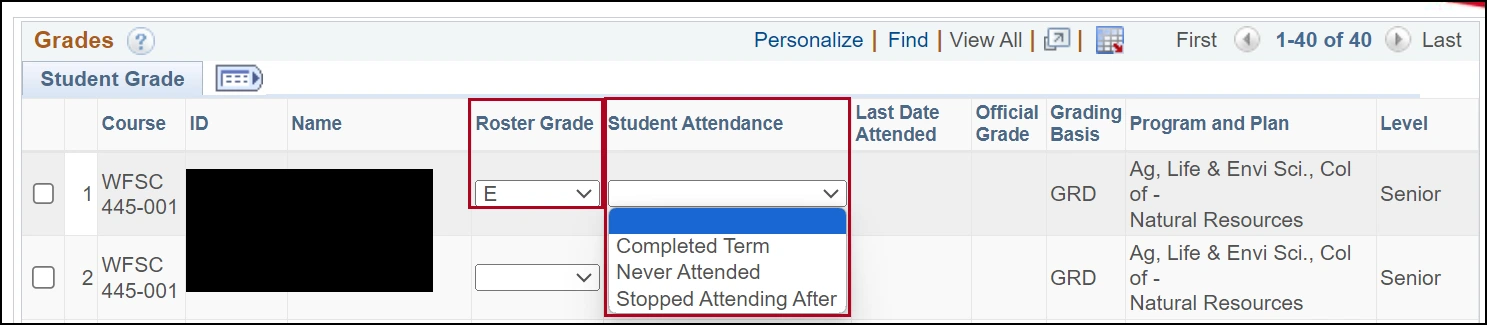
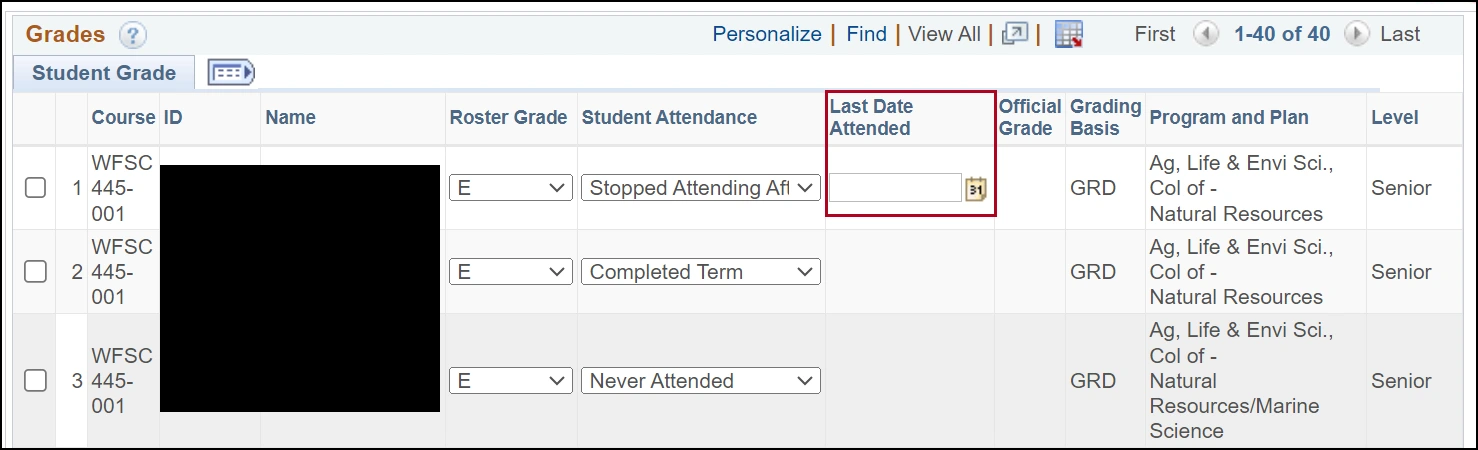
Step 3: When Stopped Attending After is selected, a date field populates in the Last Date Attended column. This field must be completed in order to save.
Step 4: Determining Last Date Attended: Both the Department of Education and the Veterans Administration require a Last Date of Attendance when a failing grade is entered. If you do not have the exact date, this can be determined two different ways:
- Use the date of the last academically related activity, such as a paper, quiz, Brightspace logon, etc.
- Approximate the date by using the first, 15th, or last date of the month.
Step 5: Once you are done, click Save at the bottom of the roster.
Note: If you import grades from a file, additional values need to be included for any failing grades. Please refer to the Importing Grades section for specific information.

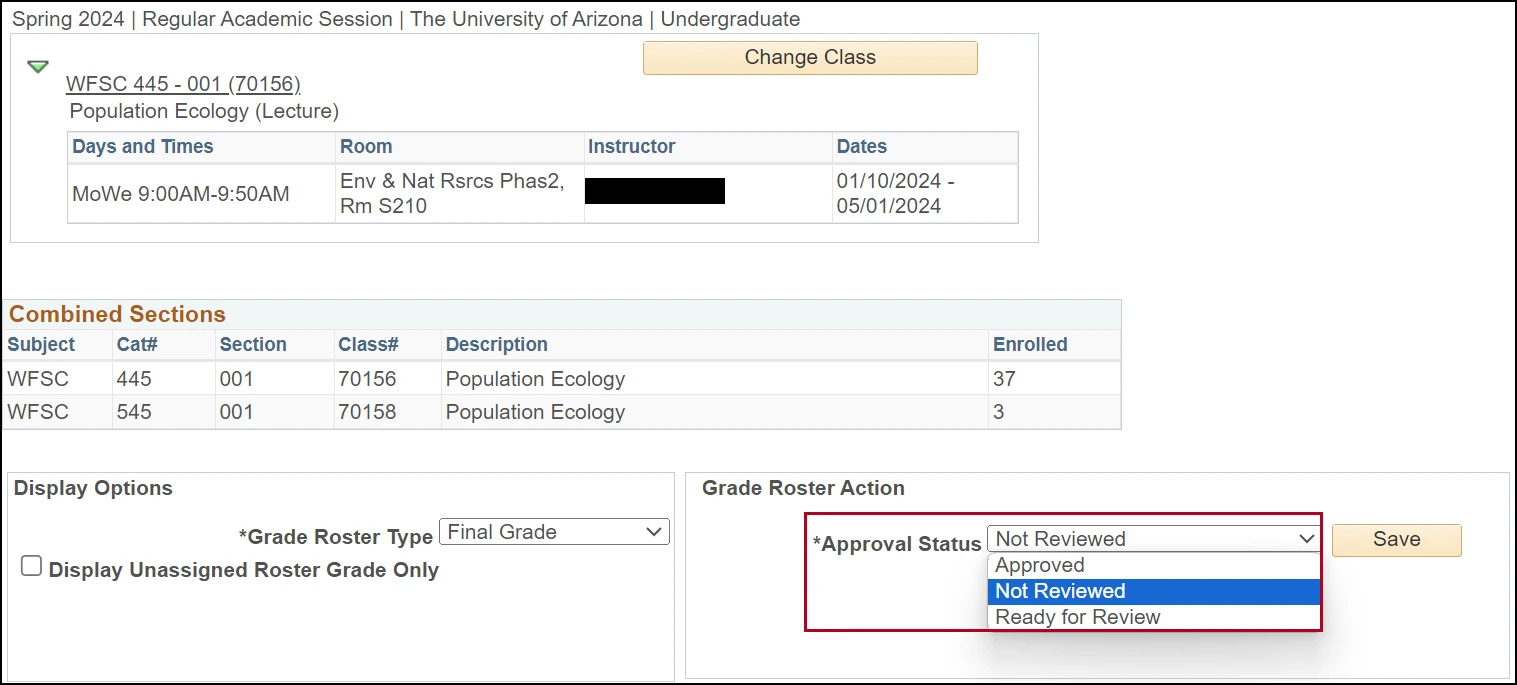
HOW TO ASSIGN AN APPROVAL STATUS
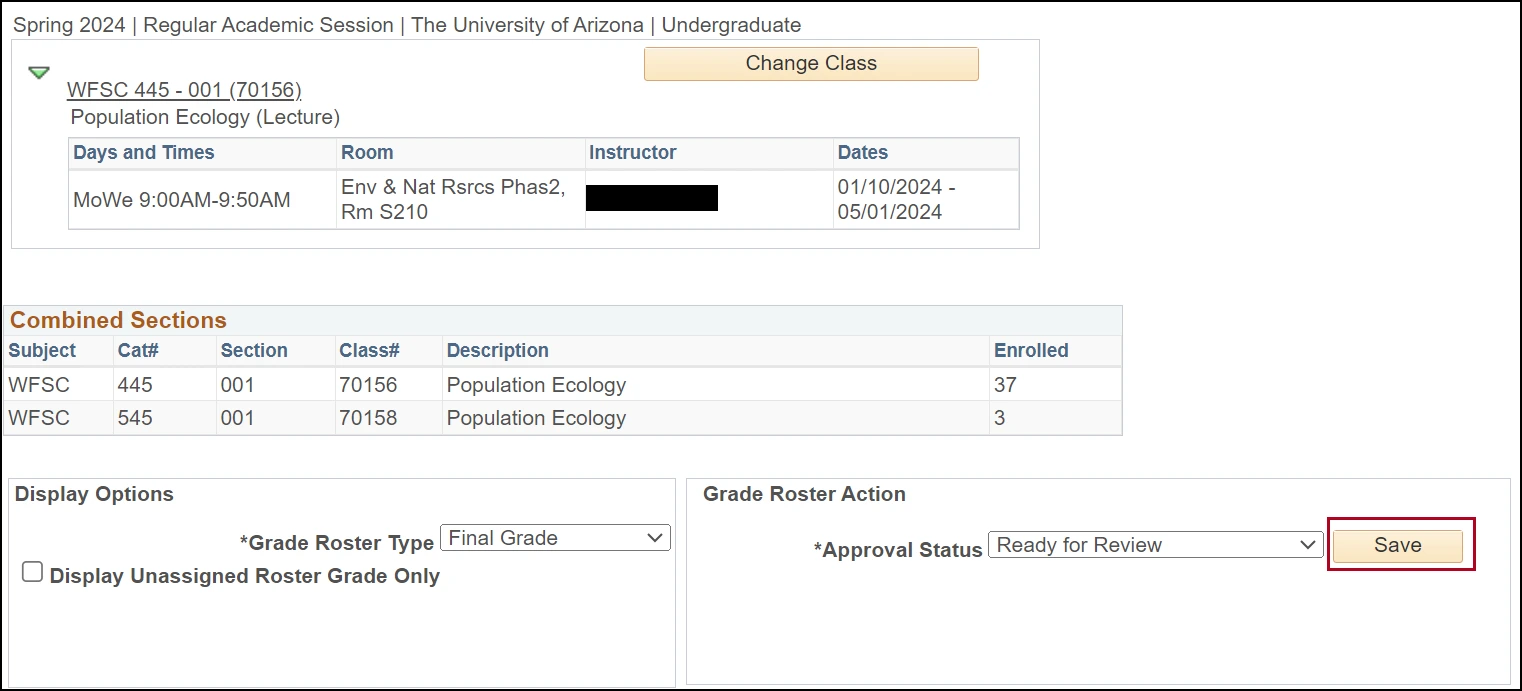
Step 1: Once you are done entering grades, you must select the approval status. In the Grade Roster Action section, select the appropriate Approval Status from the drop-down: Approved, Not Reviewed or Ready for Review.
Status Definitions:
- Not Reviewed If you are entering a failing grade (E or F) please reference the Assigning a Failing Grade section directly below.
- Ready for Review All grades are entered but you are not ready or authorized to post the final grade. Selecting this option also makes the Roster Grade column values not editable.
- Approved All grades are entered, and you are authorizing the final grades be posted.
Step 2: Once you select the appropriate status, click Save to save the grades and Approval Status change.
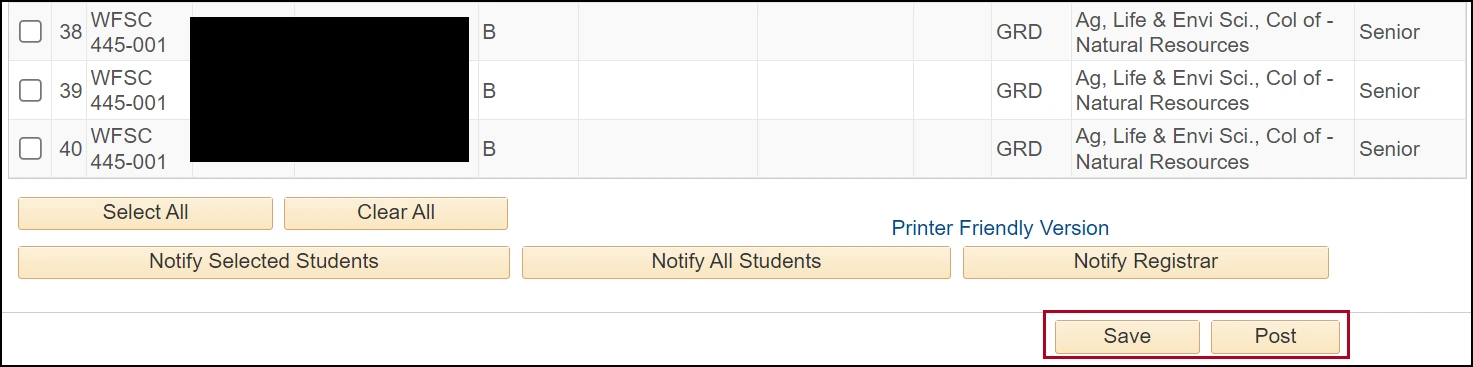
Step 3: If you have the authority to Post grades, the Post button will be visible/available at the bottom of the page. After selecting Approved in the Approval Status field, click the Post button to submit the grades. Clicking Save only saves what is on the page, the grades will not post unless you click the Post button.
Need Help? Contact Us!
Questions? Please contact Registration, Residency & Transcripts via email: reg-grades@arizona.edu or phone: 520-626-4822.
Revised 5/2025